May 6, 2026
How to Setup WooCommerce Inline Checkout With WooPaddle
Your global online store should have a checkout process that handles the entire payment without interruption. Implementing an inline checkout is the most effective way to keep customers on your site. WooPaddle is capable of doing so while using Paddle’s power as a merchant of record.
The standard pop-up checkout sometimes confuses customers since a new overlay jumps on the screen. Inline Checkout keeps everything inside the checkout page to build trust and reduce abandonment.
Table of Contents
WooPaddle gives you the option to use the embedded paddle checkout instead of the pop up checkout. It creates a native experience for customers, similar to WooCommerce’s inline checkout.
This guide provides the technical steps to activate this high-converting Paddle checkout. For the process, we’ll be using the WooPaddle plugin and the modern Paddle Billing API infrastructure.
Why a WooCommerce Store Needs an Inline Checkout
Most payment gateway forces cusomeers to go through an overlay or a new window for the checkout process. Research indicates that this complexity in the checkout process results in 18% cart abandonment. An Inline Checkout solves this by embedding the payment form into your existing WooCommerce layout.

This creates a localized checkout experience where the user feels secure because they never leave your domain. You gain full control over the customer journey with Paddle Inline Checkout. It loads inside your checkout without redirects. Thus, customers stay focused on completing the purchase process.
Key Benefits of Paddle Inline Checkout
Inline Checkout provides the following advantages for WooCommerce store owners:
- Familiar checkout experience: Users interact with a layout similar to the default WooCommerce checkout.
- Localized checkout: Paddle automatically adjusts currency, language, and taxes.
- Reduced cart abandonment: A smooth flow keeps users engaged on your store.
- Subscription support: Works with Paddle Billing-API checkout for recurring payments.
- Global compliance: Paddle handles VAT, GST, and regional taxes for your global store.
- Mobile Optimized: Works on mobile devices without zoom issues or layout shifts.
Paddle pop-up checkout can sometimes be blocked by cerntain browsers settigs. On the other hand, inline checkout loads as part of the page content. This ensures every customer sees the payment fields regardless of the browser configuration.
Comparison: Inline Checkout vs Popup Checkout Methods
Most store owners and Paddle WooCommerce integrations rely on the pop-up checkout. Yes, the pop-up checkout is a new outlook that is trending. However, it sometimes interrupts the checkout flow and creates unnecessary friction.
Here are some differences between WooPaddle’s Inline checkout and Pop-up checkout:
| Feature | Paddle popup checkout | WooPaddle Inline checkout |
| User Retention | Low (Redirects/Overlays) | High (Stays on page) |
| Branding | Paddle Branded | Native Theme Look |
| Mobile Performance | Can be clunky | Highly Optimized |
| Trust Factor | Moderate | High |
| Browser compatibility | Sometimes blocked | Not blocked |
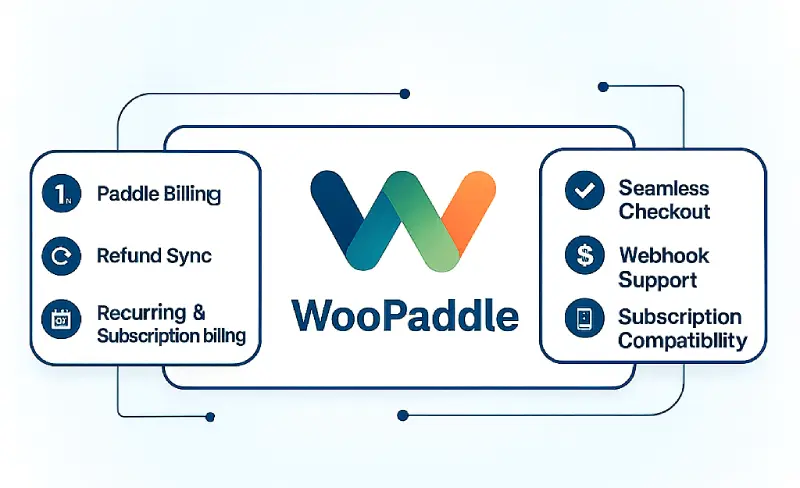
Why WooPaddle for the Paddle Billing API
WooPaddle creates a bridge between the Paddle payment infrastructure and the WooCommerce store in WordPress environment. Other plugins are still relying on the classic and deprecated Classic API. However, WooPaddle natively supports the new Paddle Billing API checkout.

This is crucial since Paddle handles VAT, GST, and sales tax for your store as a merchant of record.
Here is what the WooPaddle plugin gives you:
- Switch between the pop up and the embedded inline checkout method.
- handles VAT and sales tax in over 200 countries automatically.
- Detects user location to show a localized checkout with the correct currencies.
- Manage recurring billing for digital products.
- Prepares invoices, including all legal requirements.
WooPaddle gives your checkout process a flexibility to handle tax for global payments, which reduces admin burden. Plus, this inline checkout with the Paddle Billing-API follows an API-first Checkout model. Therefore, you get more control over how payments are displayed and processed.
Note: Learn how you can migrate to Paddle Billing before you set up the inline checkout.
Prerequisites for Setup
Prepare your WooCommerce store before setting up inline checkout with the following things:
- WordPress website with WooCommerce installed.
- WooPaddle plugin installed and activated.
- A verified Paddle Billing account (not Paddle Classic).
- Paddle Vendor ID and API credentials. (Check the documentation)
- Sandbox environment for testing
You also need access to the Paddle Developer Tools inside your dashboard. The API keys you generate there will connect directly to the plugin.
Step-by-Step Setup of Inline Checkout With WooPaddle
Here are some simple steps to activate Inline paddle checkout on your WooCommerce store.
Step 1: Install and activate WooPaddle
Here are the first few steps to install and activate the WooPaddle plugin that activates Paddle checkout for WooCommerce:
- Go to the official website of the WooPaddle.
- Download the Paddle plugin after purchasing it on the site.

- Log in to your WordPress site and go to Plugins>Add New.
- Then, upload the plugin, install it, and activate it.

Step 1: Enable the Paddle Billing API in WooPaddle
Enable the Paddle Billing API to ensure the modern Paddle payment infrastructure, which supports inline checkout. Follow these steps carefully:
- Navigate to WooCommerce > Settings > Payments.
- Locate the Paddle.com Payment Gateway in the list and click Manage.

- Scroll down to the API Configuration section.
- Check the box labeled Use Paddle Billing API.

- Confirm that the checkbox is enabled
This ensures WooPaddle uses the modern authentication system instead of the Paddle classic.
Step 2: Generate API And Other Credentials in Paddle
Now you need three specific codes from your Paddle dashboard. Open a new browser tab and log in to your Paddle vendor dashboard. Now, follow these steps to get those credentials:
Get the API Key:
- Go to Developer Tools > Authentication.
- Click the New API key button.
- Generate and save the API key.

The Client Side Token:
- Navigate to Developer Tools → Authentication in your Paddle dashboard.
- Click the Client-side tokens option to view all existing tokens.
- In the top-right corner, click the button labeled New Client-side token.

- A pop-up window will appear. Fill in the required details:
- Name: Enter a descriptive name (e.g., WooCommerce Frontend Token).
- Description (optional): Add a short description if needed.
- After entering the information, click Save.

- Your new client-side token will now be created.
- Locate the token in the list,
- click the three-dot icon next to it, and choose from the available options:
- Copy token – to copy the token for use in WooCommerce.
- Show token – to view the token if needed.
- Click Save.

- After saving, locate the new destination,
- Click the three-dot menu and select Edit.
Make sure you copy and securely store the token, as it will be required in your WooPaddle configuration for frontend authentication.
The Webhook Secret:
- First, retrieve your webhook URL from WordPress:
- Open your WooPaddle settings page.
- Scroll to the Tax & Advanced Settings section.
- Copy the URL that looks like: yourdomain.com/?wc-api=woopaddle.

- Go to Developer Tools → Notifications in your Paddle dashboard.
- Back in Paddle, click New destination.

- Fill in the required details:
- Description: WooPaddle Order Sync
- Notification type: Webhook
- URL: Paste the webhook URL copied from WordPress
- API Version: 1
- Events: Select all events

- Click Save to create the destination.
- After saving, locate the new destination, click the three-dot menu, and select Edit.
- Copy the Secret key provided.

Step 3: Configure the Inline Checkout Setting
Now you have collected all three credentials, including: Authentication API Key, Client-Side Token, and Webhook Secret. The step is to configure the inline checkout option in WooPaddle.
Follow these instructions:
- Return to your WordPress WooPaddle settings page.
- Paste each credential into its respective field:
- Authentication API Key: Paste the key obtained from Paddle.
- Client-Side Token: Paste the token you created.
- Webhook Secret: Paste the secret key copied from Paddle.

- Locate the setting labeled Checkout Type or Payment Display Method.

- Select Inline Checkout (sometimes referred to as Embedded Mode).
- Save your changes.
At this point, the Paddle Inline Checkout is fully active and ready. This will allow customers to complete purchases directly within your WooCommerce site’s checkout page.
Step 4: Testing Your New Checkout Flow
Always run a test transaction before announcing your new payment method. Use the Paddle Sandbox mode to verify that the WooCommerce Inline Checkout processes the order correctly.
- Add a product to your cart and proceed to the checkout page.

- Proceed to checkout and place an order.

- Enter your credentials, and then enter the test credit card number to test this checkout process.

- Enter a test credit card number provided by Paddle.

- Confirm that the order status updates to Processing in your WooCommerce dashboard.
- Check that the customer receives the correct email notifications.
If the frame does not appear, check your Client-side Token and ensure your site is running on an active SSL certificate. Maintaining security is essential for this API first Checkout for WooCommerce.
Best Practices to Optimize Inline Checkout
Follow these proven strategies to optimize your inline paddle checkout:
- Keep checkout fields minimal: Reduce the number of required fields to only what’s necessary. A shorter, simpler form helps customers complete purchases faster and lowers abandonment rates.
- Enable guest checkout: Allow customers to check out without creating an account. This removes friction for first-time buyers and encourages impulse purchases.
- Add trust signals: Display security badges, SSL certificates, and recognizable payment logos. These reassure customers that their payment information is safe.
- Optimize for mobile devices: Ensure the checkout process is responsive and easy to use on smartphones and tablets. Mobile-friendly design is critical since a large portion of online purchases happens on mobile.
- Use clear and transparent pricing : Show the full cost upfront, including taxes, fees, and shipping. Transparency builds trust and prevents customers from abandoning the checkout due to unexpected charges.
Together, these small but powerful improvements can significantly boost conversions. Besides, it can create a smoother checkout experience.
Why This Paddle Inline Checkout Wins
You must ensure your product descriptions and buttons are clear to fully benefit from this localized checkout. Although Paddle handles currency conversion and tax calculations, you are responsible for site speed.
The Embedded Paddle checkout increases conversion rates for two reasons. First, it respects the user’s habit. Shoppers expect to pay on the same page where they type their address. Second, it loads faster without any delay for a modal window to render.
By using the Paddle Billing-API checkout, you also future-proof your store. Paddle is moving away from the Classic API. The Billing API offers better subscription recovery tools and a customer portal. You get the security of Paddle as the Merchant of Record, combined with the user experience of a native WooCommerce store.
Recommended Articles (Optional)
If you enjoyed this article, check out some of our other useful articles, where we share tips and tactics to grow your WooCommerce store and rate it from 0 to 100.
Here are a few you might find interesting:
Start Selling Online Course with Paddle to Automate Your Taxes & Growth, where we’ve shown how you can sell online courses or digital products using the Paddle payment gateway.
How to Integrate Paddle for WordPress: The Fastest Method, where we’ve provided a path to integrate the Paddle payment on your WordPress site using the WooPaddle plugin.
10 Fastest One Page Checkouts for WooCommerce Plugins (2026 Edition), where we have curated a list of the 10 best one-page checkouts for WooCommerce. These plugins reduce the checkout distractions and create a smooth user experience.
WooCommerce Instant Checkout: Sell Faster and Boost Conversions, where we have shown how WooCommerce instant checkout minimizes every extra field, page load, and clicks.