May 6, 2026
The Complete Guide to Sell Digital Products with WooCommerce Using Paddle
WordPress gives you full ownership of your store, zero platform fees, and much flexibility as a store owner. However, your payment gateway choice is crucial if you plan to sell digital products with WooCommerce.
Table of Contents
Managing digital downloads alongside international VAT and chargeback is a heavy burden. So, you can pair your store with a Merchant of Record like Paddle to minimize any manual intervention. Your store gets automated global tax compliance, built-in fraud protection, and a checkout experience that converts.
In this guide, you will learn:
- Why Paddle is superior to standard gateways for digital goods.
- How to configure WooCommerce for digital downloads.
- Step-by-step installation of the WooPaddle plugin.
- Strategies to convert visitors into buyers.
By the end, your store will be ready to accept international payments and sell digital products online to customers in any country.
Why WooCommerce and Paddle Are Ideal for Digital Product Sellers
You get full control over the platform and branding when you sell digital products with WooCommerce. However, standard gateways like Stripe or PayPal often fall short for digital sellers. When you use Stripe or PayPal, you are responsible for the following things –
- Calculating VAT in the EU,
- Collecting sales tax in the US,
- Filing GST returns in Australia,
- Maintaining chargebacks manually.
Every country has different tax rules, and every tax season adds hours of admin work. So, a single problematic transaction can cost you the entire order amount with a crageback fee.
This is where Paddle solves the issue by operating as a Merchant of Record model. Paddle takes full responsibility for calculating, collecting, and remitting taxes globally.

This payment platform collects and remits VAT or GST globally on your store’s behalf. This means you concentrate on building products while Paddle handles the compliance work. More than 6000 SAAS and software companies rely on Paddle’s infrastructure for this reason.
WordPress is powering up more than 43% of the websites on the web, where WooCommerce dominates the eCommerce layer. You can enlist your digital products without paying any platform fees. Your product won’t be delisted from this platform, where you have a full chance to extend your store.

So, WordPress gives you the correct staging area for anyone looking to sell digital products with WooCommerce.
Here is a direct breakdown of how the three payment options compare for WooCommerce digital downloads:
| Feature | Stripe | PayPal | Paddle (via WooPaddle) |
| Merchant of Record | No | No | Yes |
| Auto VAT/GST Filing | No | No | Yes |
| Subscription Billing | Partial | Partial | Full |
| Chargeback Protection | No | No | Yes |
| Localized Pricing | No | No | Yes |
| On-Site Popup Checkout | No | No | Yes |
| Tax Plugin Required | Yes | Yes | No |
| Setup Time | Medium | Low | 5-10 minutes |
What You Need Before You Start
To sell digital products with WooCommerce, you need four things in place before touching any settings:
- WordPress Site: Get a self-hosted WordPress site and install WooCommerce in your WordPress site. Any reliable managed WordPress hosting provider (Hostinger, Hostgator, Hosting.com, Bluehost, GoDaddy) works for your WordPress site. It takes a few minutes to install and set up your WooCommerce store.
- Digital Products: Prepare the digital product files that you want to sell using your WooCommerce store. These can be ebooks, PDF guides, software, templates, audio files, video courses, or plugin zip files. WooCommerce gives you the flexibility to publish downloadable products and handle licensed products.
- Paddle Account: You need to create your Paddle account by signing up at paddle.com. New accounts in 2026 require you to set up the payment process with Paddle Billing API. If you are using an old account, you are already using the Paddle Classic.
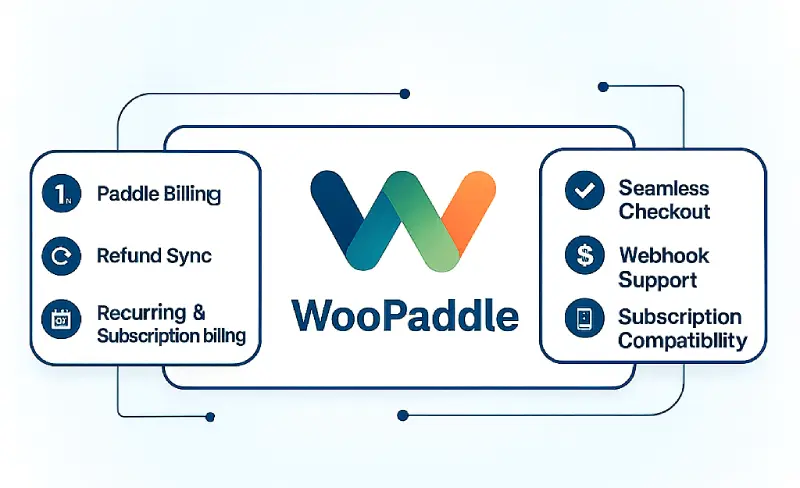
- WooPaddle Plugin: You need to purchase the premium WooPaddle plugin developed by Codepopular. This is the purpose-built plugin that connects WooCommerce to Paddle’s payment infrastructure. The plugin is optimized for the Paddle Billing API in WooCommerce with better webhook and subscription management than any alternative.
The WooPaddle plugin costs $69 for a single-site lifetime license. It includes lifetime automatic updates and one year of premium support. You can use it for both the WooCOmmerce Classic Checkout and the new Block Checkout.
Note: Learn how to migrate from Paddle Classic to Paddle Billing with a comprehensive guide.
The Configuration Process To Sell Digital Products With WooCommerce
You need to adjust the default settings to effectively sell digital products with WooCommerce. Here are the steps involved:
Step 1: Configure Store Settings
Here are some default settings of WooCommerce that you should configure first:
- Navigate to WooCommerce Settings and select the Products tab.
- Under Downloadable Products, set the download method.
- Choose Force Downloads or X-Accel-Redirect to protect your files from direct URL access.

- Set download expiry and attempt limits to reduce piracy.
- Enable guest checkout in the Accounts and Privacy tab to reduce friction.

Step 2: Create Your First Digital Product Listing
In this step, you need to mark your product as both virtual and downloadable. This helps behave your products as downloadable or digital products. Follow the steps below:
- Go to Products and click Add New.
- Insert product Title and Description.
- Set the product type to both Virtual and Downloadable.

- The Virtual checkbox removes shipping requirements.
- The Downloadable checkbox triggers the file delivery system.
- Use benefit-led language in your descriptions to convert visitors.
- Upload your secure product file to the internal WordPress directory.

For each product, configure:
- Download files: Upload your actual product file. WooCommerce stores these securely outside the public web root, which prevents direct URL access.
- Download limit: Set a specific number of allowed downloads per purchase to limit file sharing. Three to five is a reasonable default for most products.
- Download expiry: Set an expiry in days if you want download links to expire after a period.
Quick Tips That Help You Get More Sales
Here are some short techniques that you can apply to sell digital products with WooCommerce for more conversions:
Your product description is the only sales argument a digital buyer sees before purchasing. Show them the outcome of your digital product, not only the feature list.
Instead of writing “This is a 45-page PDF guide,” write “Get the exact framework our customers use to launch their first WooCommerce store in a weekend.” This type of description attracts and converts.
Add a short preview or sample of your products on your WooCommerce store’s product page. You can do the following things –
- Add a sample chapter for an ebook
- Add a demo video for a course,
- Add a screenshot preview for a template.
According to Baymard Institute research, 70.19% of online shoppers abandon their carts for various reasons. Letting buyers see exactly what they are getting before they pay is one of the most effective ways to reduce that number.
How to Install and Configure WooPaddle (Step-by-Step)
This is the core of the Paddle WooCommerce integration. The full process takes under ten minutes and requires zero coding.
Step 1: Purchase and Install WooPaddle
First of all, you need to purchase the plugin:
- Visit codepopular.com and select your license tier (single site, five sites, or ten sites)
- Complete your purchase and go to My Account, then Licenses
- Download the WooPaddle .zip file to your computer

Then, you need to install the plugin in WordPress:
- Go to your WordPress dashboard and navigate to Plugins, then Add New
- Click the Upload Plugin at the top of the page

- Select the WooPaddle.zip file you downloaded
- Click Install Now, then click Activate Plugin once installation completes.

Step 2: Activate Your License Key
Now activate the license key of WooPaddle in your WordPress site:
- Navigate to the WooPaddle settings page inside your WordPress admin panel
- Locate the license activation field on the settings page

- Go to CodePopular.com, then My Account, then Licenses, and copy your license key
- Paste the key into the license field and click Activate License

- Wait for the confirmation message showing the license is active
Without completing this step, the plugin runs in demo mode only and cannot process live transactions.
Step 3: Retrieve Your Paddle Billing API Credentials
Generate your API Key:
- Still under Developer Tools, click Authentication
- Click the Client-side tokens tab, then click New API Key

- Give the key a descriptive name
- Set Expires to Never Expires

- Set Permissions to All Read and Write
- Click Save and immediately copy the key

You cannot retrieve it again after leaving this screen
Get your Client-side Token:
- Still under Developer Tools, then Authentication, click the Client-side tokens tab
- Click the New Client-side token button in the top-right corner

- In the pop-up, enter a token name (required) and an optional description
- Next, click Save to create the token.

- Once created, click the three-dot icon next to the token
- Select the Copy token from the options displayed

- Now go back to WooCommerce > Settings > Payments
- Select Paddle.com Payment Gateway from the list.
- Click Manage to configure the payment gateway.
- Head to the Tax & Advanced Settings section.
Step 4: Set Up Your Webhook URL
Copy the URL from WooPaddle:
- Return to your WordPress admin panel
- Open the WooPaddle settings page
- Go to WooCommerce > Settings > Payments
- Select Paddle.com Payment Gateway from the list.
- Click Manage to configure the payment gateway.
- Locate the Webhook URL field and copy the unique URL displayed there

Add it to Paddle:
- Log in to your Paddle dashboard
- Navigate to Developer Tools, then click Notifications
- Click Add Destination or New Webhook

- Paste the WooPaddle webhook URL into the designated URL field
- Save your changes to confirm the connection.
- Click the New Destination button to open the settings sidebar.
- You will need to provide specific details to link your site successfully.
- Destination Description (Required): Enter a clear name to identify this connection.
- Example:
WooPaddle Payment Notification - Notification Type: Select Webhook from the dropdown menu.
- URL: Paste the Webhook URL you copied earlier from your payment configuration page.
- Note: A standard URL typically looks like:
https://yourwebsite.com/?wc-api=woopaddle
- Example:
- To ensure compatibility, apply the following settings:
- API Version: Select 1.
- Usage Type: Choose both Platform and Simulation.
- Events: Click Select All Events to ensure you receive updates for every transaction type.
- Review your entries for accuracy, then click the Save Destination button to activate the connection.

- After clicking Save Destination, locate your newly created entry in the list.
- Click the three-dot icon (More Options) next to the destination name.
- Select Edit from the dropdown menu.
- Find the field labeled Webhook Secret ID
- Click the Copy button (or manually highlight the ID) to save it to your clipboard.

Tip: Keep this Secret ID secure, as you will need to paste it into your WordPress payment settings to finalize the integration.
Step 5: Configure WooPaddle in WooCommerce
Now you need to provide the API Key, Vendor ID, and Webhook Secret in WooCommerce.
Here are the steps to follow:
- Go to WooCommerce > Settings > Payments tab.
- Find Paddle.com Payment Gateway in the list and click Manage.
- Go to the API Configuration section.
- Check the box for Use Paddle Billing API (recommended for all new users)
- Paste your Client-side Token beside the Client-side token field
- Paste your API Key beside the Authentication API Key field
- Paste your Webhook Secret beside the Webhook Secret field

- Scroll down and click the Save Changes button to apply the settings.
Select Your Checkout Type
For Checkout Type, you have two options:
- Popup/Overlay: This checkout opens a Paddle payment modal directly on your site. Your customer never leaves the page. This is the highest-converting option and the recommended default.
- Inline Checkout: This checkout method embeds the payment form inside your WooCommerce checkout page itself.
Note: Learn how to set up WooCommerce inline checkout with WooPaddle to offer a native experience to the customers.
Step 6: Test Before Going Live
You must test the entire customer journey before you’re willing to sell digital products with WooCommerce on a live site.
- Stay in sandbox mode of WooPaddle and add one of your digital products ot the cart.

- Go to the shop page of your WooCommerce store and click Add to cart below the digital product.

- Then click the Proceed to Checkout Button

- You can use Paddle’s sandbox test card numbers (available in your Paddle developer documentation).
- Enter the demo card details and click the Continue button.

- Next, enter payment credentials and click the Pay button

- To confirm successful payment, you will see the order received notice.

Verify these three outcomes before switching to live mode:
- The Paddle checkout form appears correctly on your site
- The WooCommerce order shows as completed with the correct amount
- A matching transaction appears in your Paddle sandbox dashboard
- The download link is delivered to the test email address
If any of these fail, the most common cause is a security or firewall plugin blocking the webhook. Temporarily disable your security plugin during testing to confirm. Once all checks pass, return to WooPaddle settings, disable Sandbox Mode, update your credentials to live keys, and save.
No Tax Plugin Needed: How Paddle Handles VAT and Compliance
One of the greatest benefits when you sell digital products with WooCommerce via Paddle is the removal of tax burdens. You do not need third-party plugins or platforms like TaxJar, Avalara, or VAT MOSS.
Paddle’s Merchant of Record status means it is the legal seller in every country where your customer buys. When a customer in Germany buys your ebook, Paddle applies the correct German VAT rate. Then it adds it to the total price, collects it from the customer, and files the return with German tax authorities.
Paddle also generates tax-compliant PDF invoices for every transaction while you sell digital products with WooCommerce. This automation is a major reason why developers choose to sell digital products in WordPress using this specific stack.
For your B2B customers, Paddle also supports VAT number input at checkout. It triggers the EU reverse-charge mechanism automatically. Thus, your business customers will not pay VAT that they can claim back anyway.
Selling Subscriptions and Recurring Digital Products
Recurring revenue provides sustainability when you want to sell digital products with WooCommerce as a subscription. You need to create a new WooCommerce product and select a subscription- compatible product type. Then map it to your Paddle subscription plan in the WooPaddle product settings.
WooPaddle handles the complete subscriber lifecycle with the following features:
- Monthly and annual billing cycles
- Free trial periods
- Usage-based billing tiers
- Upgrade and downgrade between plans
- Automated dunning emails when payment cards decline
- Automatic retry logic for failed renewal charges
- Webhook-triggered order status updates after every billing event
This means your WooCommerce dashboard stays accurate in real time. When a subscription renews, the order updates. When a customer cancels, the order reflects it. When a card fails and eventually succeeds on a retry, the subscription continues without your involvement.
How to Secure Your Digital Products in WooCommerce
Paddle’s fraud protection system runs on every transaction that goes through WooPaddle. It protects your intellectual properly which is vital while selling WooCommerce digital products.
Use the following layers of security when you sell digital products with WooCommerce:
- Native Protection: Use WooCommerce download limits and expiry dates.
- Secure Hosting: Store files outside the public web root.
- Fraud Protection: Paddle uses machine learning and behavioral analysis to score every transaction. Plus, it comes with an address verification system, CVV matching, and 3D secure authentication.
- Chargeback Handling: Paddle fights chargebacks on your behalf as the Merchant of Record.
For refunds, WooPaddle’s one-click refund sync lets you initiate a refund from the WooCommerce order screen. The plugin communicates with Paddle automatically, processes the return, and keeps your financial records aligned across both platforms.
Note: Learn Marketing strategies to boost your digital downloads in 2026
Reaching Global Customers With Localized Pricing
Let’s say a customer in Brazil, India, or Nigeria sees your ebook priced at $97 USD. In this scenario, the conversion rate drops since most customers expect to see their familiar currency.
Paddle’s localized pricing feature lets you set region-specific prices that reflect local purchasing power. WooPaddle automatically passes the customer’s detected location to Paddle at checkout. Then it displays the correct regional price in the customer’s local currency. You do not need to manage currency plugins or exchange rate plugins in WooCommerce.
Global eCommerce is projected to reach $8 trillion by 2027. Paddle considers this projection and allows payment in 20+ currencies and local payment methods. It also supports payment through Apple Pay, Google Pay, credit, and debit cards. Localized pricing is the fastest way to access more of that market without changing your product at all.
Sell Digital Products With WooCommerce Using Paddle Today
Most digital businesses struggle with a tax advisor, a dedicated developer, and a high-converting payment system. The setup you have just walked through gives your WooCommerce store a huge leap forward.
WooCommerce offers the stage to start, and Paddle gives you the merchant of record. Besides, WooPaddle connects these two platforms and handles the payment process with a high-converting checkout experience.
This setup protects you from fraud and ensures you comply with global laws automatically.If you are ready to scale your business, focus on your products and let Paddle handle the rest. Get WooPaddle today and begin your journey to global digital sales.
Recommended Articles (Optional)
If you enjoyed this article, check out some of our other useful articles, where we share tips and tactics to grow your WooCommerce store and rate it from 0 to 100.
How to Sell PDFs Online With Paddle in WooCommerce, where we have detailed the exact steps to protect and deliver high-value documents while automating global VAT collection.
Start Selling Online Course with Paddle to Automate Your Taxes & Growth, where we’ve shown how you can sell online courses or digital products using the Paddle payment gateway.
How to Integrate Paddle for WordPress: The Fastest Method, where we’ve provided a path to integrate the Paddle payment on your WordPress site using the WooPaddle plugin.
WooCommerce Instant Checkout: Sell Faster and Boost Conversions, where we show how WooCommerce instant checkout minimizes extra fields, page loads, and clicks.